Tutorial
This tutorial is going to teach you how to
- Create a customer
- Create a currency
- Create a product
- Create a contract
- Create a quote
- Create an invoice
- Set up your accounting
- Book an invoice in your accounting
- Book a customer payment in the accounting
Befor your start I recommend you first have a look into the Intro. This gives you a first idea of the basic structure of the koalixcrm. When you understand the structure and functions of koalixcrm or any other large django application you are ready to start with the tutorial. I recommend further that you have firefox installed, and did have a look at the Installation - and installed the koalixcrm according to this description on your apache2 webserver.
Create Your First Customer
Let say you want to Register the following Customer: Privat address:
John Smith
Ave 1
90990 Smallville
Phone:
Mobile:
Email:
Business address:
Smith and Sons
Ave 2
120987 Largeville
Phone:
Mobile:
Email:
Logging In Adminpage
Depending on where you installed your koalixcrm - in our tutorial i expect you installed it on your localhost (the computer your sitting in front of) - Visit the http://localhost/admin page in your browser. Please use Firefox for this first test, it seems as if there exist the less bugs in grappelli with this browser. You will soon find the login page
fill out the username and password you set in the Installation in the syncdb procedure.
Create a Currency

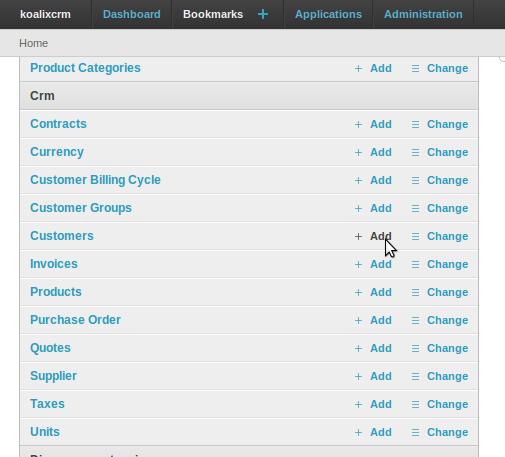
Select “Add Customer”
After the login you will find the dashboard you already know from the Intro. In the Apllicationlist select the “Customer” - add button
Fill out Fields
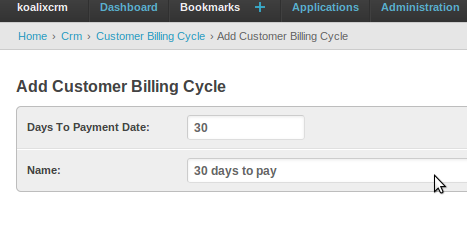
After adding the customer you will have to fill out all required values to get a valid registered customer. You will have to fill out two “postal address” and two “phone address”. Further you will need to add a new “Payment Modality” This new payment method can be added by pressing the greeen “plus” sign beside the “default payment modality” drop down box. A new page will open up and give you the ability to add a new payment method. Fill in the values as described in the image below:
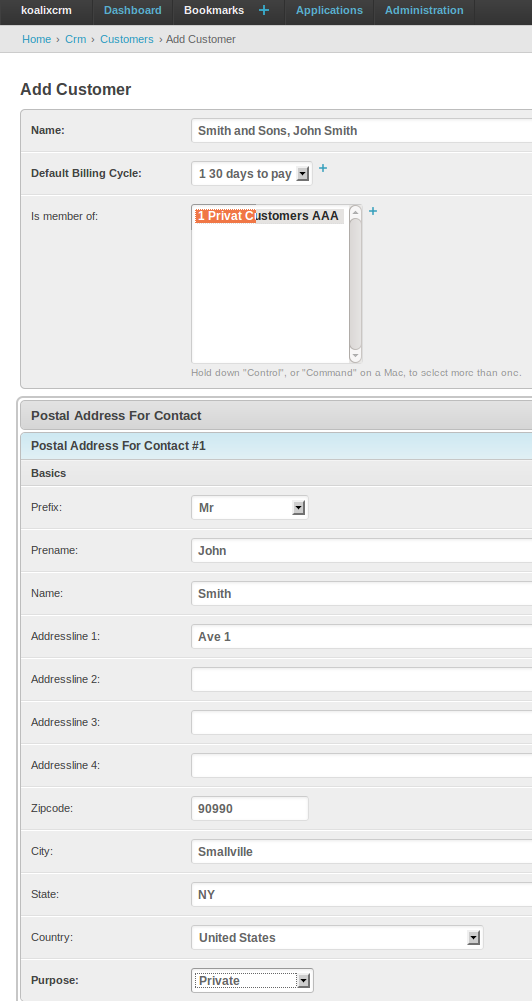
After you filled in all required values you will have to click on the save button. This click will bring you back to the customer adding view ... and you will see that the default payment method is now set. For the next ... the customer group we have to do exatly the same. click again on the green “plus” signe beside the list and you will soon get a pop up where you can add your first default customer group. Fill in the values as described in the image below

After that you have to fill out all the addresses defined in the header of this tutorial. Finish the customer registration by pressing the save button
Look at your first Customer
Ok now we registered your first Customer. Of cause to have a customer is not that interesting, we hope that a customer is going to order something, or needs an invoice, a quote or something else. This will e the next step of the tutorial. But furst have a look at your bright shiny customer by selecting customer’s in the dashboard as described in the Intro.
Create Your First Contract
I expect your still looking at your first customer we just created. The next step is that you click the checkbox on the left side of your customer and look at the the actions-list that appears on the bottom of the page.

select “Create Contract” from this list. This will bring you to the “add contract” form. The advantage of doing it this way - instead of adding a new contract over the dasboard - is that you have some values, like the defaultuser, already set. this will give you some additional seconds for your daily work. Ok now i expect you are surprised a little bit... where do i select that i want to have a quote or an invoice. Well in koalixcrm a contract is not an invoice and a contract is not a quote. A contract is simply a place to store all kind of documents that are related to the contract. This can of cause be a invoice, a quote but also purchaseorders and so on.
At this point ... by clicking on the save button you already finished the creation of a contract.
Create Your First Quote
You have up to now no products, no prices and no units registed. In order to be able to offer a product to a customer we of cause need some products first.... you could do it the lazzy way by adding the product while your registering the quote but in this case we are going to register the products, units and prices befor we create the quote.
Create Your First Product
To create your first product visit the dashboard by either following the breadcrumps back to the dashboard

or visit http://localhost/admin again. Press the Units Add button to get to the Unit adding form. Now fill out all the required fileds to register the unit hours
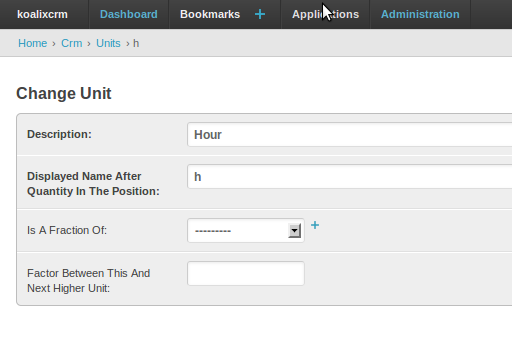
Press save, add an other unit by again pressing the add button. Now we create a unit minute.

Pess save and go back to the dashboard
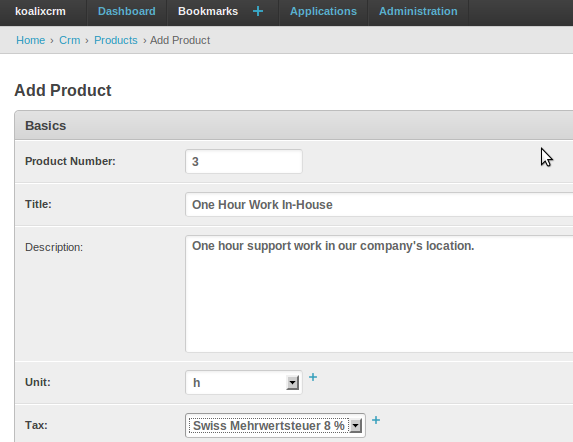
As we have registered the new units now we are able to create a product. Press the Products add button to get to the products adding field. We start with a common product called Manpower Fill all fields with the following values:
as you know every product has its price espencialy manpower - time is money. Thats why we have to add at least one price for this product by filling the fileds the following values.
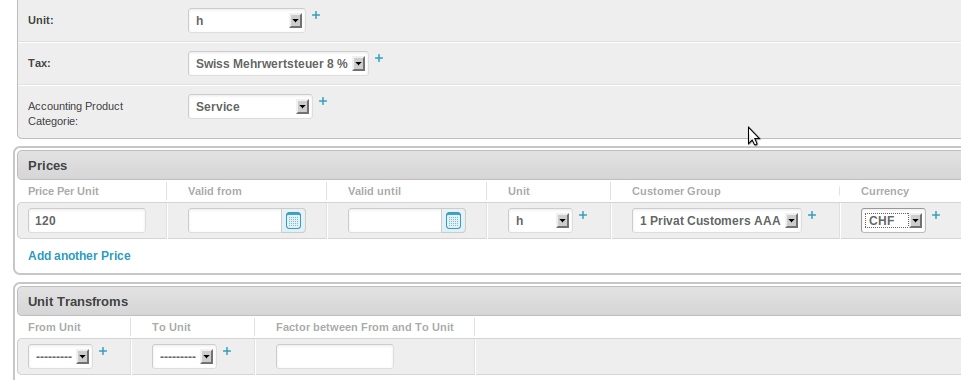
You will find an other part of this form called unit transfrom. Unit Transforms are sometimes needed when you for example have stacks of certain products but only one price per piece. Leave this blank when you only have one unit for one product.
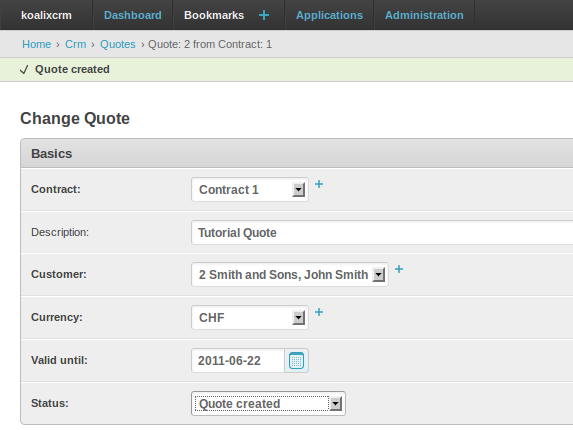
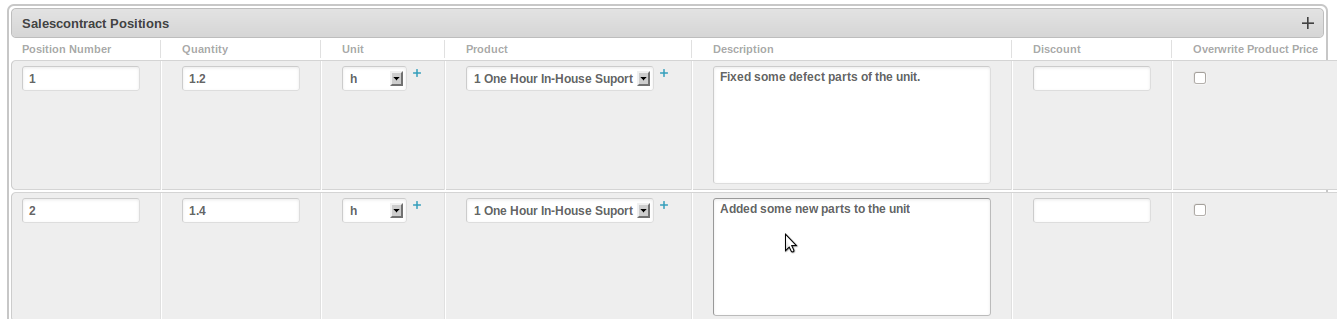
after adding this product you are ready to create your first Quote by going to your dashboard. Open Contracts, select the contract where you want to apply a quote and select “Create Quote” from the Actionslist. A Window will open and give you the possibility to fill out your fist quote. As you can see, there are lots of predefined values we got because we created the quote with the action instead of dasboard quote add. There are two major parts of a quote: first the general values like “valid until”, “description” and so on. And second you find the positions of the quote.
by pressing the “+”-sign you can add as much positions as you like. Fill in the values as described below
Click on the save button to finish your first quote. Go back to the dashboard, go to quotes and select the newly created quote. From the actions slect “Create Quote PDF” to get a pdf of this new quote.
NOTE! In the current version its needed that you first do a recalculation of teh prices befor you create the pdf. You can do this by selecting your quote and choose recalculate prices form the actions list.
Create Your First Invoice
This is going to be a very short chapter because all you got to do is either repeat the description above but insted of selecting “Create Quote” in the Contract Actionslist you select “Create Invoice” or by selecting your new Quote and call the action “Create Invoice”. The second way is much easier and faster because the program just takes all values and positions from the quote and transforms it into a invoice.
Register The Invoice In The Accounting
To be able to register the invoice in your accounting we first need to set up the accounting and adjust your products.
Create Accounts
Currently there is only a swiss accounts table i really hope i get some help soon to create some generic account tables for other countries as well because if you have to fill all them out on your own this is going to take quite some time.
Its urgent that you have you have set up these special accounts at least:
- Open Reliabilities
- Open Intrests
- Customer Payment Account